Moving my Apple TV remote into Home Assistant
Yesterday I wrote about a small Python terminal remote for my Apple TV. It solved the immediate problem of typing searches and long passwords without an iPhone, but I still wanted something I could use from my Android phone. By the end of that post, I was considering a small web app running on my home server.
My first thought this morning was to add a --serve argument to the terminal app. Keep the command-line interface, add a few buttons and a text field in a browser, and reuse the pairing code. That seemed manageable, but I already had Home Assistant running with its Apple TV integration paired. Before adding another service to maintain, I wanted to see how much of the problem the community had already solved.
The keyboard was already there
I started with the Home Assistant Apple TV integration documentation. Navigation was straightforward: remote.send_command supports the direction buttons, Select, Home, and Menu. The more useful discovery was that text input had its own actions too:
apple_tv.set_keyboard_textreplaces the focused field’s contents.apple_tv.append_keyboard_textadds to the existing text.apple_tv.clear_keyboard_textempties it.
There is also a binary sensor for keyboard focus. As with the terminal app, a compatible text field needs to be open on the TV first. Sending text and submitting the TV’s form are separate operations.
That covered the part I actually needed. Home Assistant could handle the connection and pairing, leaving the dashboard to provide the interface.
A community remote instead of another app
I found Nerwyn’s Universal Remote Card, an excellent community dashboard card with Apple TV support, navigation controls, and a keyboard dialog. It also has a textbox mode for pasting a whole value and sending it in one go, which is much closer to how I used the terminal version.
This was a better fit than writing my own web interface. The card already handles the layout, touch controls, and text entry, while Home Assistant provides the app and authenticated dashboard. I only needed to configure the pieces I wanted.
I installed Universal Remote Card through Marketplace (previously known as HACS) and added an Apple TV dashboard.
The dashboard configuration
I kept the layout small: the current title, a direction pad, playback controls, and text input. A little space above and below the circlepad made it feel less cramped.
The following can be pasted into a Manual card. Replace remote.apple_tv and media_player.apple_tv with your own entities, and replace both occurrences of YOUR_CONFIG_ENTRY_ID with the Apple TV integration’s config entry ID. This is different from the device ID. With your actual remote entity substituted, Developer tools → Template can look it up:
{{ config_entry_id('remote.apple_tv') }}
type: vertical-stack
cards:
  - type: markdown
    text_only: true
    content: >-
      {{ state_attr('media_player.apple_tv', 'media_title')
         or 'Nothing playing' }}
  - type: custom:universal-remote-card
    title: Apple TV
    platform: Apple TV
    config_entry_id: YOUR_CONFIG_ENTRY_ID
    remote_id: remote.apple_tv
    media_player_id: media_player.apple_tv
    rows:
      - - power
        - menu
        - home
      - - circlepad
      - - skip_backward
        - play_pause
        - skip_forward
      - - keyboard
        - textbox
        - clear_text
    custom_actions:
      - type: button
        name: clear_text
        icon: mdi:backspace
        tap_action:
          action: perform-action
          perform_action: apple_tv.clear_keyboard_text
          data:
            config_entry_id: YOUR_CONFIG_ENTRY_ID
    styles: |
      #circlepad {
        margin-top: 12px;
        margin-bottom: 12px;
      }
The power button wakes the TV; holding it sends it to sleep. Menu acts as Back, and the centre of the circlepad selects. The title depends on what the active TV app exposes to Home Assistant, so it won’t always have useful information.
The keyboard button sends text as it is typed. The textbox button waits until Send is pressed, which is the option I prefer for logins. Both replace the TV field’s contents. The dialog is a visible textbox rather than a masked password field, and it calls the Apple TV action directly rather than storing the value in an input_text helper.
The phone interface comes with it
I wanted mobile access from the start, and putting the remote on a Home Assistant dashboard gives me that through the Home Assistant Companion app. The same dashboard is available in a desktop browser and in the app on Android. There is no separate Android interface to build or sideload, and the phone doesn’t need its own pairing with the Apple TV.
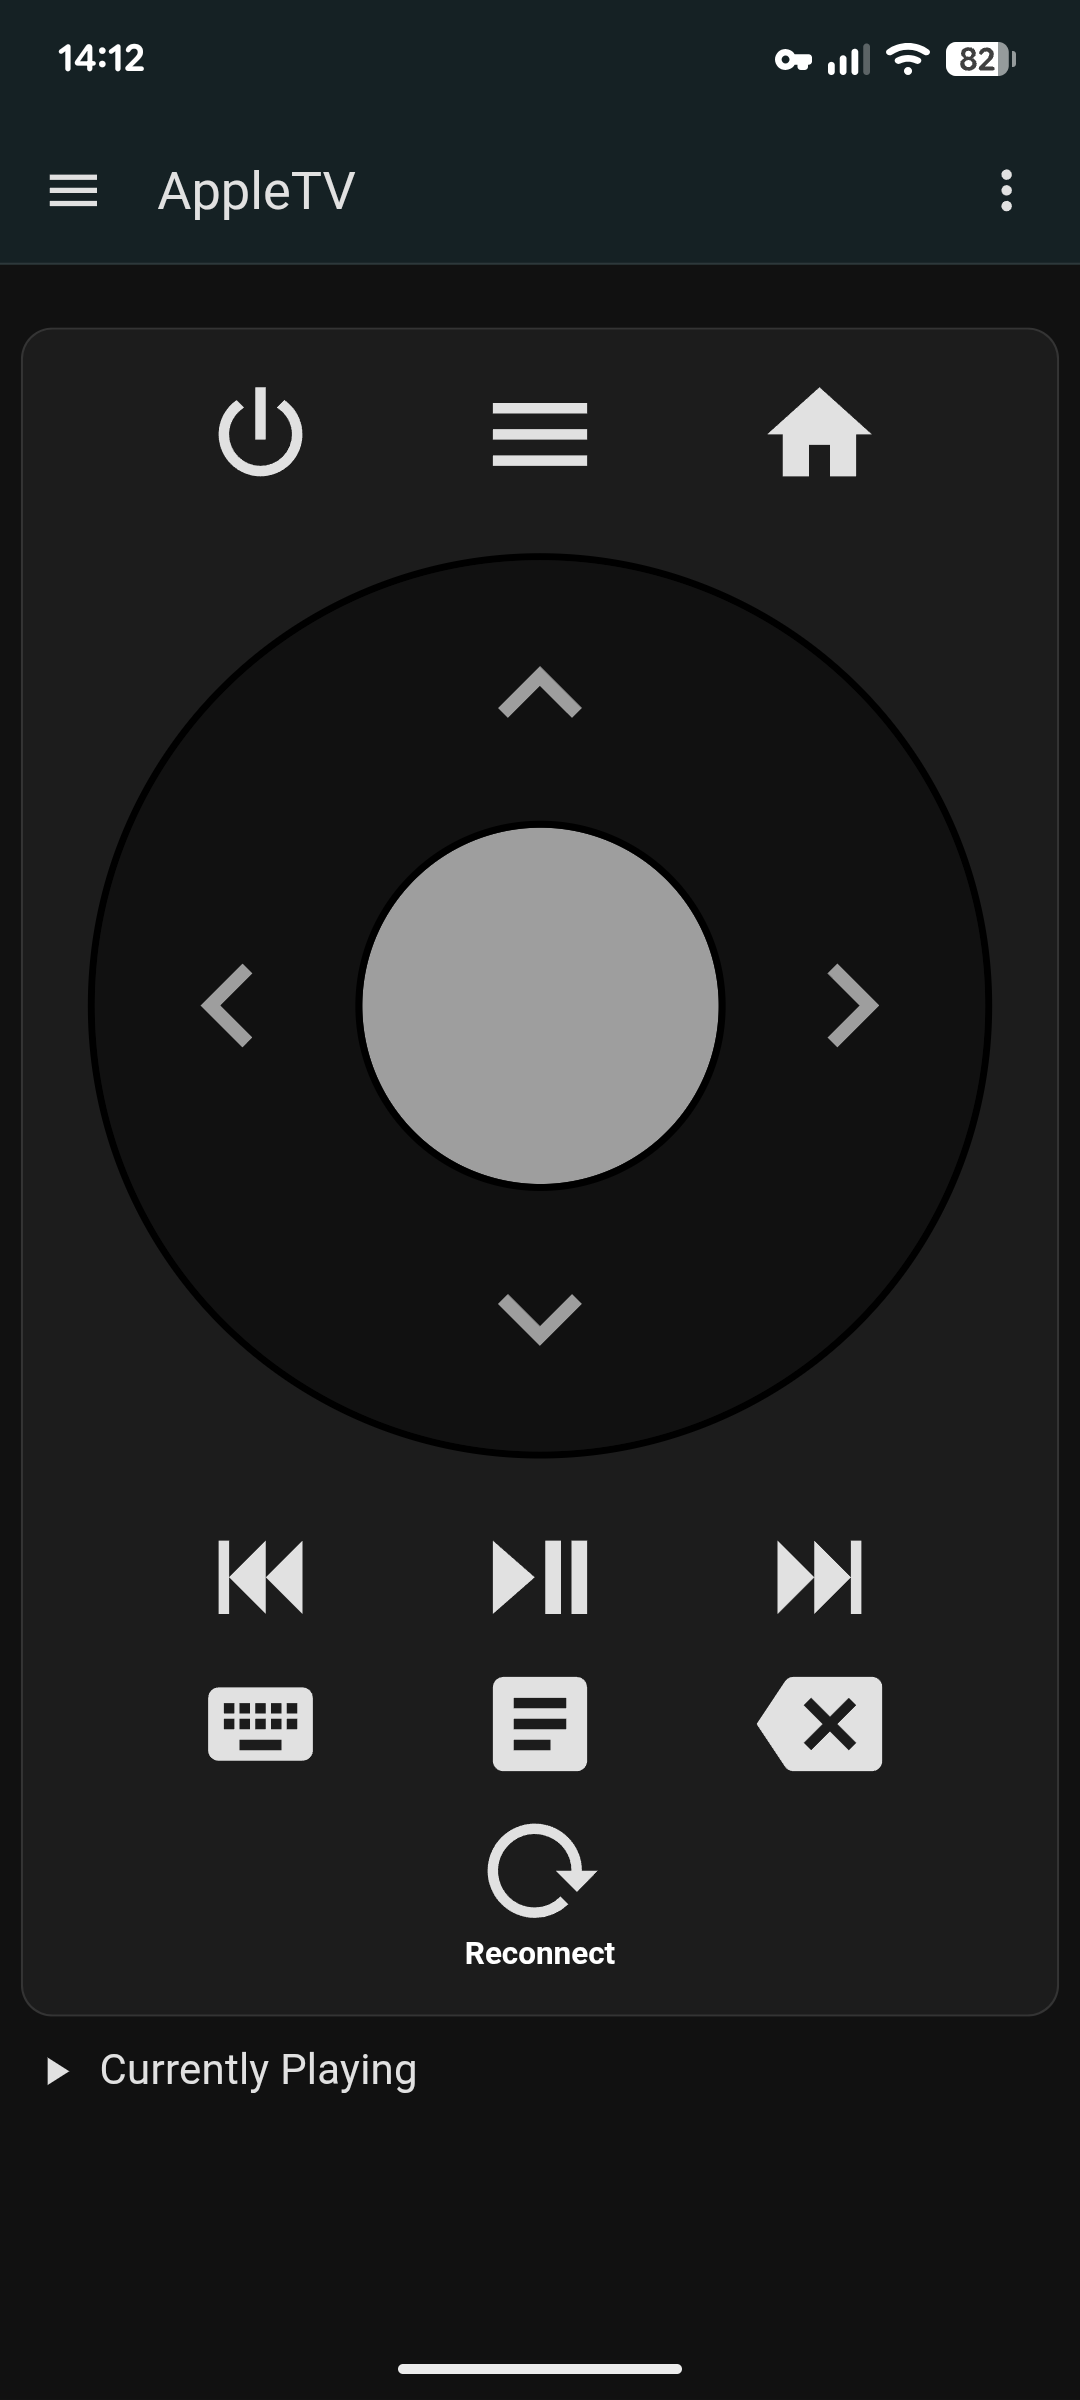
Home Assistant is the bridge: the phone opens the dashboard, and the server sends the commands to the TV over the local network. At home, that fits the setup I already run. Access away from home would use whatever remote access is configured for Home Assistant.
Less code to look after
The terminal remote is still useful when I’m at my computer, and building it helped establish that the keyboard input worked. The next iteration turned out to be a dashboard configuration rather than another application.
Home Assistant and Universal Remote Card cover the parts I was about to write. There are still dependencies and updates to look after, but the pairing, mobile interface, and remote controls are maintained by projects already solving those problems. For this setup, a small amount of YAML gets me further than another service of my own.